homemade jotters

Nick and I decided to continue last years tradition of making Christmas presents, which perhaps sounds sweeter than it actually works out in practise. We set aside a day to embrace our inner elf and set up a production line. One day is simply not enough if you want to go at a leisurely speed. These shopping lists and memo pads were my idea for our Mum's. I designed them and printed them out, but it was at this stage I realised just how many pages would be needed. On our 'making day' Nick was cutting the sheets from 10.30am to 8pm with only a brief lunch break! So it isn't for the faint hearted, which is why, unsurprisingly this is not a DIY tutorial.
If you do still fancy giving it ago or trying something similar, I used bookbinding glue to create the pads. I stacked all the pages and weighed them down with heavy books. This helps to keep them aligned, as well as preventing too much paper warping when the glue's applied. I used 3 coats, allowing each one to dry in-between. Once finished you can easily peal a sheet off when it's written on. It's a bit like a 'post it note'. I also bought some magnetic strips with adhesive backing. I attached these to the shopping lists so they could sit happily on a fridge. 


merry christmas

In amongst all the frills and thrills of Christmas day it's easy to lose sight of what we're celebrating, when in fact it's the best news ever to hit this world. God came to this earth as a man, giving up the glory of heaven for a humble life as a human named Jesus. He shone his light into this dark and corrupt world on a mission to save us. By nature we have all rejected and rebelled against God, but in Jesus at Christmas God sends the remedy. He restored the relationship that we broke and gave us new life in him if we just believe.


Photograph sourced from Bonjour Tristesse

a spoonful of sugar


I love Oreos and I love fudge so this seemed like a very happy idea. The recipe is so simple and doesn't require a huge list of ingredients. 

To make the fudge...
1.Break Oreos into small chunks and split one of the cans of condensed milk in half. 
2.Heat some water in a saucepan until it simmers and then put the white chocolate, butter and condensed milk in a heat proof bowl and melt over the the simmering water.
3.Drop Oreos into the mixture and give it one gentle stir. Then pour this mixture into a lined 8 x 8 inch pan.
4.Leave in the fridge for one hour until set.
5.Then wash the heatproof bowl and reuse over the simmering water, to melt the dark chocolate and the remaining can of condensed milk. Stir while it's melting and then pour over the white chocolate layer and spread to the sides. 
6.Place back in the fridge for another hour before cutting.

calendar love


1.TwoPaperDollsShop/2.Darling Clementine/3.Mademoiselleyo/4.Dozi/5.Bomobob/ 6.Pistachio Press/7.Rifle Paper Co.


It's nearly time to throw away your 2012 calendar and wheel in a fresh one for 2013. In case you're lacking in inspiration, here's seven possible contenders.


falalalalala

I was recently asked to design a flyer for Aberdeen University  and Robert Gorden University Christian Union’s carol service. I pretty much had free reign, which always means more thinking time to start with, but much more fun in the end!

count down


I know I said I wouldn’t be back for a month but I’ve been designing an advent calendar on and off for a little while and thought it made a whole lot of sense to post this before advent started, incase you want to have a go at making it. I decided to well and truly ditch a typical Christmas colour palette. Perhaps I’m feeling a little jaded by all the reds and greens that saturate the shops. Each box can hold a chocolate, sweet, toy, message or anything you like.
Download the printable A4 versions here. There are 9 pages worth! Print them onto card and cut around each box. Score along the lines marked below and stick the flaps to the sides of the box with double sided tape or strong glue. I would whole heartedly suggest strong glue. Some of my boxes sneakily popped open after a night’s sleep. Leave the edge marked below, to use for keeping the lid closed. You could also buy some sticker dots to hold the lids closed until they need to be opened.


bye bye basingstoke

Today is moving day! We are waving good bye to our cosy, little flat in Basingstoke and transporting all our worldly possessions to Shepherd's Bush in Laaandon town! God has graciously helped us raise money through some very generous people, which will fund Nick's year as a pastoral intern. He'll be working for a newly planted church in Shepherd's Bush, which is really exciting. You can follow his journey on his shiny, new blog. After 4 years I will finally be living in the same place as my work, a surreal notion after becoming a seasoned commuter. Amidst all the fun and excitement of a new start it's sad to be leaving our first home together, as well as both our families and close friends. I'm taking this opportunity to have a break from blogging for a month, in order to settle in to life in a new place, as well as catching up on four other projects I'm working on for friends. See you in a month!

it's in the name

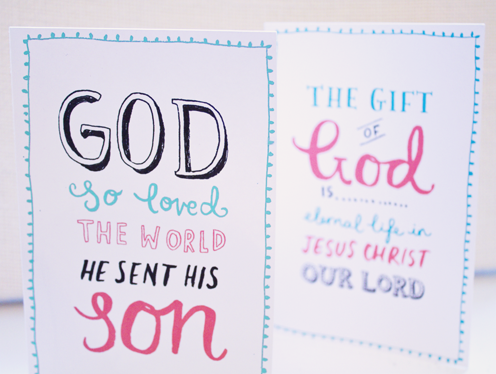
This has been a long time coming! Every year I say I'll make some Christmas cards that are about Jesus and what we're really celebrating, but I've never got around to it. If you're a Christian then you might well struggle to buy Christmas cards, as lets be honest there aren't many decent ones out there. Most of the token 'religious' cards in the shops look like they're stuck in a different decade! As a result many of us younger folk end up gravitating towards the cards with cute reindeer, cozy mittens or jolly little snowmen on the front. They look nice but they don't celebrate Jesus coming into the world to save us from our sins. 
These may not look typically festive, but i thought I'd offer some free printable cards for you to download. Simply download, print onto A4 card and cut and score. Each one has the full bible verse on the back. 

i spy christmas

It’s less than 2 months until the stockings go up and the turkeys come out. You might be one of those scarily organised people that bought all their Christmas presents back in June but for most of you, I’m sure the thought has only just crept into your mind. Last year we made all our Christmas presents which turned out to be really fun and I’m sure most people enjoy receiving handmade gifts. I had a conversation with a friend the other day about DIY Christmas presents and she said she couldn’t make them because she wasn’t creative but here’s an idea which doesn’t require much artistic flair at all, especially as I’ve designed the labels for you to download. Excuse the poor camera phone photos, but you get the idea. We tried two simple recipes to fill our gift jars....

To assemble you’ll need kilner jars or any jar with a sealable lid, ribbon, brown paper, card, spray mount/glue, a hole punch and scissors. Print the fudge and shortbread tags onto brown paper (matt side rather than shiny to avoid ink smudging). Then mount the sheet onto card using spray mount or glue, cut each one out and hole punch. Fill your jars with the sweet goodies and then thread the tags on the strips of ribbon and tie in a neat bow at the top. Both these recipes keep quite well, so you could make them up to a week in advance.

playtime

I've always been a fan of Belle & Boo's vintage style illustrations but I was even more excited to come across the latest selection of cards on Nineteen Seventy Three's website. I love that they look like they're straight out of a story book and the range name 'Playtime' certainly suits this fun collection of cards. I went a little bit gooey over the colour palette as well...mmm.

ladies afternoon tea

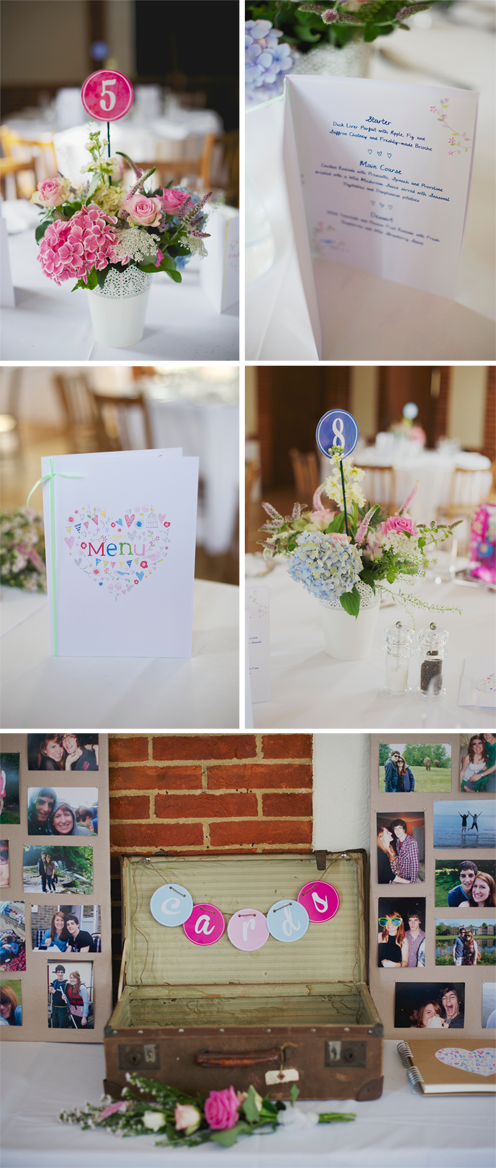
Last Saturday was an excuse to get a bit girly with an afternoon laid on for the ladies of our weekly bible study group. It was a chance to chat and hear a bit more about how we all became Christians and our journey with Jesus since. It was also a chance to eat some delicious sweet treats and sip cups of tea (very sophisticated indeed). The tea party certainly wasn’t a unisex occasion, with the doily theme, heart bunting and mint and candyfloss colour palette running throughout. 
Speaking of all this tea, I have to say I've never been that interested in the stuff until very recently and I'll admit it's entirely down to my husband’s influence. To understand Nick's relationship with tea a little better, all I really need to say is that he has a sizeable box devoted entirely to good quality loose leaf teas and he is more than happy to tell you the origin, flush and flavours of each individual one. If guests ask for tea in our house, they don't quite realise what they've let themselves in for. This self-confessed ‘tea snob’ has some how managed to convince me that a cup of loose leaf black tea is very satisfying on a cold evening, in fact I’m pretty sure I initiate a nice brew more than him at the moment. Having said this nothing will replace my morning coffee. 

la vie et belle

Here’s some work from a talented duo that go by the name of Evajuliet. You probably won’t be surprised to learn that one’s called Eva and the other’s called Juliet. Their illustrations are gorgeous and full of personality. I love the way they bring watercolour up to date with hand painted lettering. They give me a strong urge to dust off my paint set straight away! Have a look and see a their prints and even cute plush toys on their website, as well as some lovely styled photographs of what they do.


wrap it up

Hello! It’s been a while. Here’s very simple DIY idea. I don’t think you need to be even remotely creative to have a go at this one. You can buy rolls of brown parcel paper from shops like Whsmiths, Wilkinsons, Ryman, Paperchase. Using this and a few other things you can easily create sheets of polka dot gift wrap, in any colours you like. 
To make the wrapping paper you’ll need the following....
1)Find something circular to draw round. I just had a scout round my living room to find the right size shape, but coins would work quite well too. 


2)Then draw round your object onto your sheet of card and using a scalpel, cut the circle out, whilst leaving the edges still in tact.
3) Then start placing the stencil where you want dots on the paper and using your paintbrush or a sponge to dab on the paint.


Don’t use too much paint as this will create blobs and the colour will saturate the stencil and misshape it. I made a new stencil for each colour to avoid the stencil wearing out or colours mixing. The circles won’t be perfect but that just adds to the home printed affect...or at least I Iike to think so. In hindsight acetate would make a better stencil than card, as it should warp. Maybe give that a whirl and see.


Leave each colour to dry in between applying the next and soon you’ll have a whole sheet of dotty delight!
I styled my wrap with some bakers twine and the tags were made using some cool stamps I was given as a present. They're available from amazon I do believe. You could use the same polka dot technique (it seems almost too simple to call it a technique) for decorating other things like notepads, envelopes or even try it with fabric paint onto fabric. I’ll leave it to you to think up the rest.


drip drop

Who would have guessed I’d actually be inspired by this dreary weather we're having. Here’s a little illustration to put a cheery spin on the not so cheery weather. This week I’ve felt a strong pull back to drawing, realising I’d spent quite a lot of time immersed in graphic projects recently and as a result forgetting my good old drawing roots. From the time I could hold a pencil to about 14 years old, I sat and drew for hours and hours. Funnily enough I’d chuck everything in the bin afterwards, only recently finding out that my Mum would retrace my trail to the bin to retrieve the creation in question. She has a whole box in the loft filled with my retrieved drawings from over the years! Sneaky. So more illustration is on the agenda but posts are coming a little slower at the moment as I’m working on quite a few design commissions for friends. All exciting things but it leaves me with a bit less time to play. 

feeling wintery

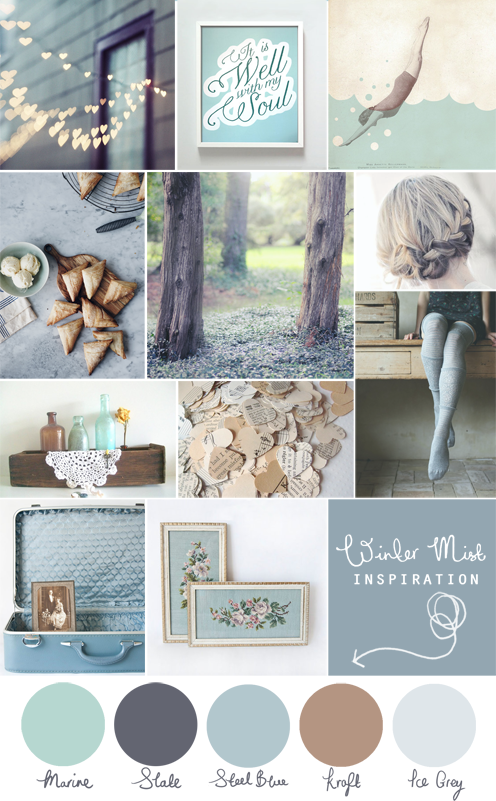
Hello temperature drop! Suddenly I’m reunited with my mack and my patterned scarf collection and waking the radiators from their slumber. I’ve bi-passed feeling autumnal and gone straight to wintery. I’m sure it has something to do with designing cards for Christmas 2013 at work. I’ve been working on Christmas since August so at least the cool weather has stopped it feeling so weird. Drawing wreaths and penguins in a summer dress and sandals just feels bizarre. In the spirit of an approaching winter I’ve put together a little inspiration board of moody and misty hues. Chilly! 


From left to right going down... 


String lights photograph / wall art / swimming illustration / sweet apple triangles / woodland photograph / french plait / wooden box / paper heart confetti / long winter socks / vintage suitcase / framed needlepoint

mr and mrs maycock

In June I posted the wedding stationary I designed for my friends Heather and Adrian. Here's a reminder. They had a gorgeous wedding with the reception at Rotherwick Village Hall back in August. The sun was shining and the hall was full to the brim with family and friends. I ended up getting quite involved in some of the creative details for the reception which I loved!
Their colourful summer fete feel gave plenty of scope for cute, creative touches. It was really lovely to help with more than just the wedding stationary and to be able to carry the same theme through into other elements of the day.
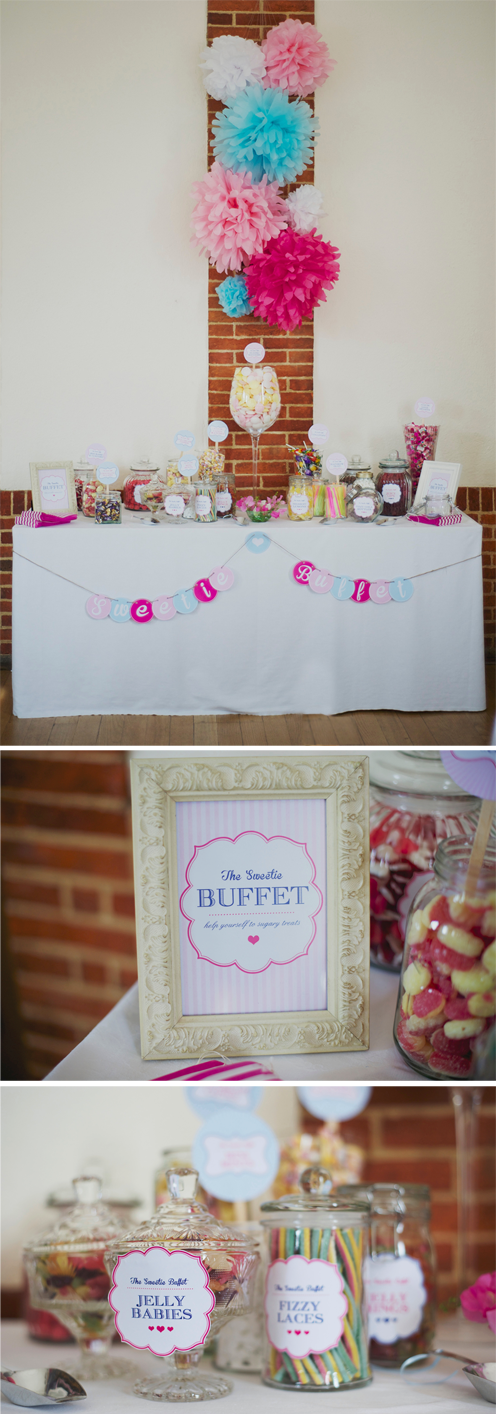
They decided to have a sweetie bar which I helped design and also helped eat on the day, yum! Every one’s favour was a sweetie buffet ticket to go and help themselves and I’m pretty sure that every one made the most of that little treat, by the look of the bulging pick ‘n’ mix bags. Sugar rushes all round!


picnic 'how to'


1. hanging flower tins...

Peel the label off an any old tine and scrub to get rid of the stickiness. Then masking tape the area you don’t want painted, making sure the tape joins up. Then paint any colour you want. I used a paint tester pot from a hard wear store and did 3 coats to get the colour looking even, allowing each coat to dry in between. Once all coats are dry, peel off the tape and wrap some twine around the top. You can knot two pieces of twine either side and gather them up to make another knot. Make sure it hangs evenly and then tie another long piece of twine to hang. Then you can put a little bit of water in them, along with your flowers and tie to anything you want.

2. homemade guacamole...

  • 1 large ripe tomato
  • 3 avocados, very ripe but not bruised
  • Juice of 1 large lime
  • Handful of coriander, leaves and stalks chopped, plus a few leaves roughly chopped, to serve
  • 1 small red onion , finely chopped
  • 1 chilli , red or green, deseeded and finely chopped
Cut the tomato into tiny pieces, so that it turns into a pulp. Tip these into a bowl and then de-stone the avacados, and scoop out in with the tomato. Tip all the rest of the ingredients into the bowl and season. Mash everything together. Serve straight away with some fresh coriander sprinkled on the top or leave the avocado stone in the bowl along with the dip and chill in the fridge.

3. picnic lunchboxes...

Download my free printable template. To make one as photographed, print onto A3 or to make a mini one you can print the A4 version. The smaller template could make a sweet gift box as well. Then cut the template cut out and draw around onto some cardboard or card, depending on how sturdy you want them, marking where the fold lines are. Cut out with a scalpel and ruler and score down the fold lines. The box will then easily take on the lunchbox shape and can be secure the flaps with double sided tape. The handles should be able to bend into the slots so it can be carried.

4. picnic invites & labels...

I’ve designed these free downloadable printable labels and invites. The labels can be printed onto paper or card and then secured to your drink containers or the picnic boxes. Print the invite front and back onto card, cut out and then use glue or double sided tape to secure a lolly stick at the bottom. Then glue or spray mount the two front and back together, sandwiching the lolly stick in between and there you have your picnic paddle invite!

late summer picnic

I’ve been gathering and making some things for a styled picnic for quite a while now but with an August full of weddings and disappointing weather in between, it was only last weekend that I got around to doing it. Sunday was a surprise scorcher which was perfect! So here’s a sunny idea for a DIY picnic and I’m sure the concept would work just as well in your back garden for a few friends. In my next post I’ll let you know how to make the bits and pieces and the labels and invites will be available as a free download. Enjoy!
There’s nothing quite like homemade guacamole on a hot day. That’s actually quite a bold statement but it really is up there. Mexicans know how to cater for heat. The chilli kick and zesty lime keep the dip really fresh. I’ve only found out why people leave the avocado stone in the dip. It’s to stop the avocado going brown! Call me stupid but I just thought it was for decoration.

time flies

Today is our Anniversary! We were saying this year has gone so fast but at the same time can't remember what it was like not being married, except that it wasn't as good! I'm looking forward to another humbling year of growing and learning together as well as some exciting new adventures. As far as all my creativity goes, it's heavily encouraged by Mr Muncey so if it wasn't for him I probably wouldn't be doing any of this blogging lark at all.


Photos from Rebecca Wedding Photography


colour and cheer

Here’s an Etsy shop that caught my eye. All the bold shapes and colours are a breath of fresh air. I really like the mix of wooden beads and neon, partly because it seems as if the two things shouldn't go together and yet they do. All the best combinations start that way. Here's a similar little DIY idea from Martha Stewart if you like that sort of thing. 

merci

Sometimes it's nice to tell people you're thankful for them. I can't imagine any one not wanting to hear that. I often fell very blessed for the people that God has placed in my life, especially my husband. With that in mind I made him a little thank you postcard a few weeks ago. It's easy to be thankful and just keep it to yourself but why not encourage someone and show they're appreciated with a simple note. You don't need a postcard to say thank you but it's a good excuse. Download the designs here.
Print the postcards onto coloured card or use the coloured backgrounds I've created in the downloads. The envelopes need to be printed onto A3. You then cut around the edges and the mini diagrams will show you where to fold. Stick it all together with some glue or double sided tape and voila.  Happy making!

sun on a stick

I’ve been meaning to make ice pops for aaages but kept on forgetting to order some lolly sticks. I thought up some combinations that sounded yummy and decided to find out if they actually were. I just used cheap ice lolly moulds but ditched the plastic sticks that come with these kinds of sets. I used a short piece of string across each individual mould and secured the wooden sticks with a tiny bit of cellotape. This way the stick stayed where I wanted it to while ice pops set. There may be a much easier way of doing this but I couldn’t think of it.

For these you’ll need....

  • Lemonade 
  • A small bunch of mint 
  • Lime chopped thinly 
  • Some vodka or rum if you'd prefer
Pour a small measure of vodka into  the bottom of each mould. Don’t be too generous otherwise you might end up with a very clinical tasting ice pop. Then roughly chop the mint and add as much as you want, along with the lime slices and then almost fill with lemonade. Remember it will swell slightly as it freezes. You may need to push some of the lime and mint down to the bottom if they float up to the top. Then put them in the freezer and leave preferably over night but it will depend on your freezer.

For these you’ll need....

  • Vanilla yoghurt
  • Strawberry yoghurt
  • Mango and Passion Fruit yoghurt
You will have to add each layer separately and then allow to partially freeze. I left them for about 5 hours in between layers. I also added a few drops of yellow food colouring to the mango and passion fruit yoghurt before layering, which made the colour a bit more punchy, giving a better contrast between this layer and the vanilla. Try spooning the yoghurt in carefully and wipe any excess from the sides, to get nice clean lines.