
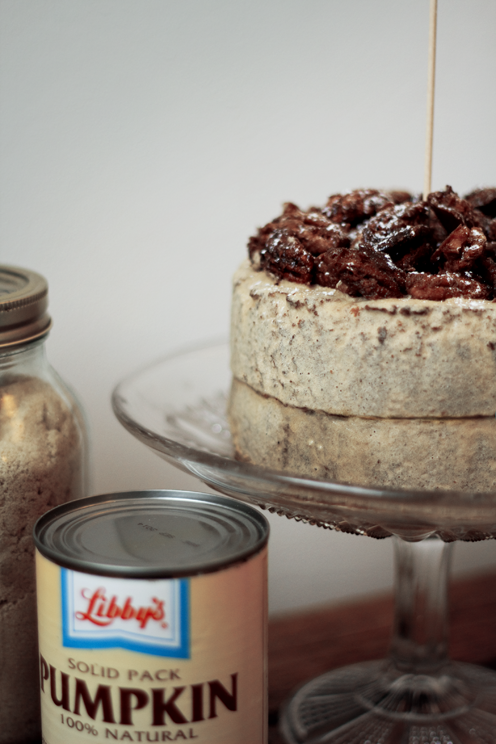
 Ok so I love pumpkin! Pumpkin soup, pumpkin pie, roast pumpkin, pumpkin ravioli, pumpkin bread...I could go on. Sometimes I think I should have been born in America. Anyway I'm always finding yummy recipes that incorporate this delicious ingredient but in Britain you can't just walk into any old supermarket and pick up a can of pumpkin puree. The not so appealing alternative would be waiting until pumpkins are in season and then hacking into to the monster in order to cook it (for a LONG time) and mash it all up. This is far too time consuming not to mention hard work for someone with weedy arms like myself. You can imagine my sheer delight when I realised there was a Waitrose down the road from our new flat, selling the pumpkin puree I've been after. I found this recipe that combines pumpkin with another one of my favourite sweet ingredients, pecans.
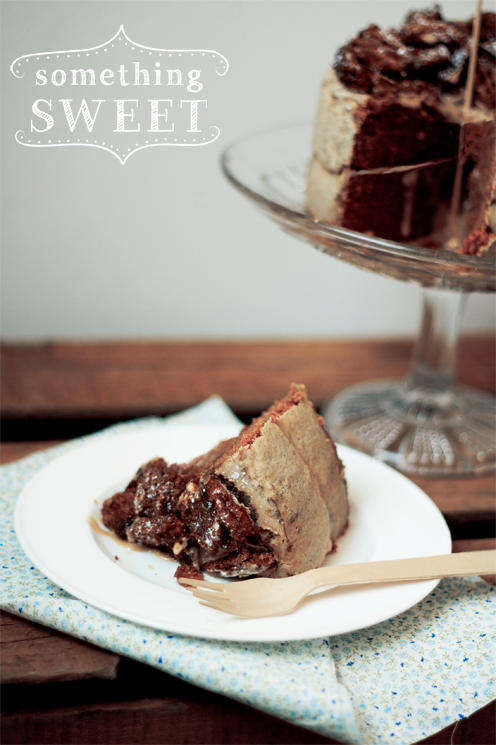
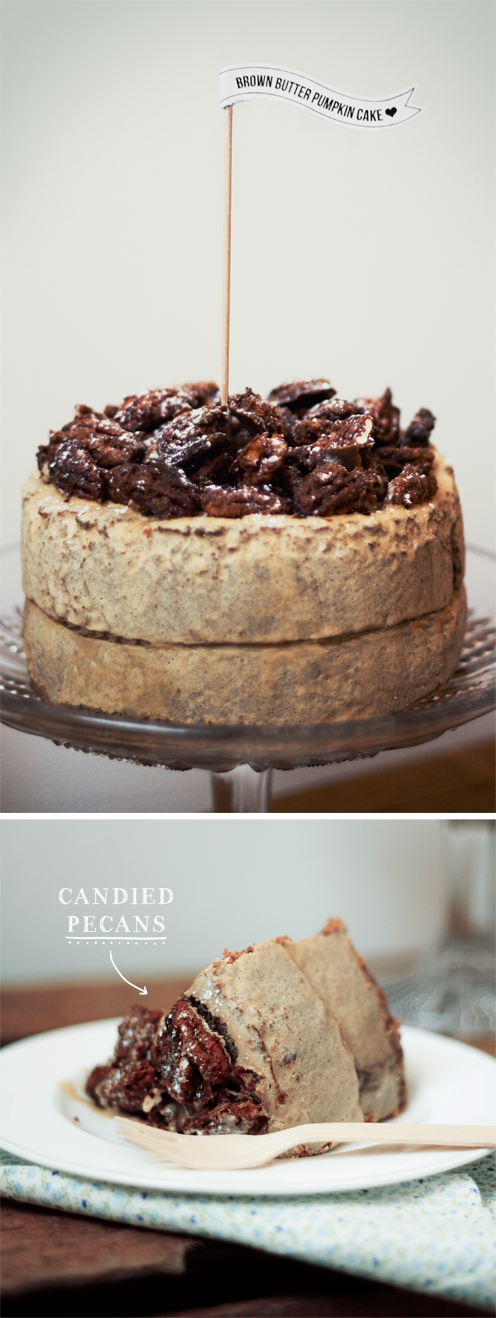 The pumpkin acts a bit like carrot in a carrot cake, keeping the whole cake really moist. The candied pecans topped it off really nicely! A wintery treat!
For the cake: grease two 6 x 3 inch cake pans and heat oven to 180 degrees
- 3/4 cup unsalted butter
- 2 cups unbleached all-purpose flour
- 1-1/2 tsp. baking soda
- 1-1/2 tsp. ground cinnamon
- 1 tsp. ground ginger
- 3/4 tsp. kosher salt
- 1 1/2 cups pumpkin puree
- 1-1/2 cups granulated sugar
- 2/3 cup firmly packed light brown sugar
- 2 large eggs, room temperature
- 1/3 cup buttermilk. room temperature
-
1) Melt butter in a saucepan, stirring until it turns a golden colour. Leave to cool.
2) In a bowl whisk flour, baking soda, cinnamon, ginger and salt.
3) In another bowl whisk the pumpkin puree with the granulated sugar, brown sugar, eggs and buttermilk until blended.
4) Stir in the dry flour mixture until just combined and then gently whisk in the brown butter until fully incorporated.
5) Divide the batter between the two prepared pans.
 For the brown sugar cream cheese:
- 2 cups dark brown sugar, finely packed
- 1 cup unsalted butter at room temp
- 500 grams cream cheese
- 2 cups pecan halves
- 1/4 cup heavy whipping cream
- 1 cup dark brown sugar
1) Beat butter and brown sugar together until smooth
2) Add cream cheese (cold) and beat until just blended
For the candied pecans: keep oven at 180 degrees
1) Mix together pecans, brown sugar and cream and spread over a greased baking tray
2) Cook for 15 minutes, stirring once.
2) Cook for 15 minutes, stirring once.
Assemble cake: Let cake layers cool fully. Cut rounded tops off to create an even surface. Spread a tick layer of frosting in between the two layers to sandwich them together. Then cover the outside with icing and scatter the candied pecans on top.


