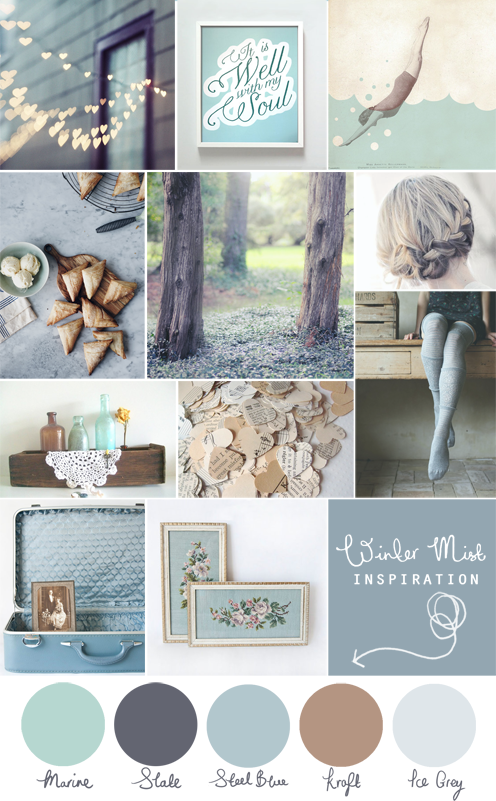
From left to right going down...
String lights photograph / wall art / swimming illustration / sweet apple triangles / woodland photograph / french plait / wooden box / paper heart confetti / long winter socks / vintage suitcase / framed needlepoint

 In June I posted the wedding stationary I designed for my friends Heather and Adrian. Here's a reminder. They had a gorgeous wedding with the reception at Rotherwick Village Hall back in August. The sun was shining and the hall was full to the brim with family and friends. I ended up getting quite involved in some of the creative details for the reception which I loved!
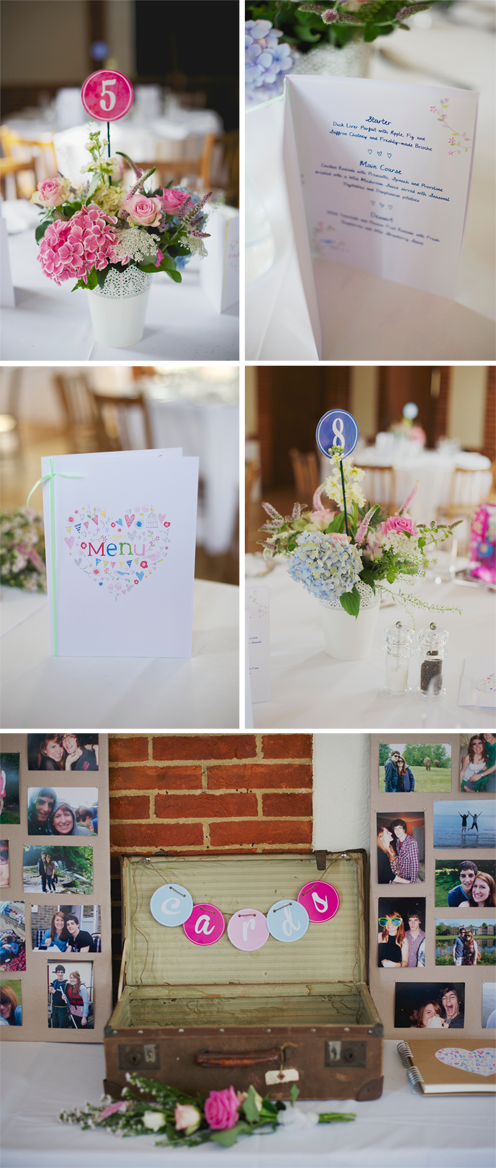 Their colourful summer fete feel gave plenty of scope for cute, creative touches. It was really lovely to help with more than just the wedding stationary and to be able to carry the same theme through into other elements of the day.
 They
decided to have a sweetie bar which I helped design and also helped eat
on the day, yum! Every one’s favour was a sweetie buffet ticket to go
and help themselves and I’m pretty sure that every one made the most of
that little treat, by the look of the bulging pick ‘n’ mix bags. Sugar
rushes all round!
They
decided to have a sweetie bar which I helped design and also helped eat
on the day, yum! Every one’s favour was a sweetie buffet ticket to go
and help themselves and I’m pretty sure that every one made the most of
that little treat, by the look of the bulging pick ‘n’ mix bags. Sugar
rushes all round!


 I’ve been gathering and making some things for a styled picnic for quite a while now but with an August full of weddings and disappointing weather in between, it was only last weekend that I got around to doing it. Sunday was a surprise scorcher which was perfect! So here’s a sunny idea for a DIY picnic and I’m sure the concept would work just as well in your back garden for a few friends. In my next post I’ll let you know how to make the bits and pieces and the labels and invites will be available as a free download. Enjoy!
 There’s nothing quite like homemade guacamole on a hot day. That’s actually quite a bold statement but it really is up there. Mexicans know how to cater for heat. The chilli kick and zesty lime keep the dip really fresh. I’ve only found out why people leave the avocado stone in the dip. It’s to stop the avocado going brown! Call me stupid but I just thought it was for decoration.
 Today is our Anniversary! We were saying this year has gone so fast but at the same time can't remember what it was like not being married, except that it wasn't as good! I'm looking forward to another humbling year of growing and learning together as well as some exciting new adventures. As far as all my creativity goes, it's heavily encouraged by Mr Muncey so if it wasn't for him I probably wouldn't be doing any of this blogging lark at all.
 Here’s an Etsy shop that caught my eye. All the bold shapes and colours are a breath of fresh air. I really like the mix of wooden beads and neon, partly because it seems as if the two things shouldn't go together and yet they do. All the best combinations start that way. Here's a similar little DIY idea from Martha Stewart if you like that sort of thing.
  Sometimes it's nice to tell people you're thankful for them. I can't imagine any one not wanting to hear that. I often fell very blessed for the people that God has placed in my life, especially my husband. With that in mind I made him a little thank you postcard a few weeks ago. It's easy to be thankful and just keep it to yourself but why not encourage someone and show they're appreciated with a simple note. You don't need a postcard to say thank you but it's a good excuse. Download the designs here.
 Print the postcards onto coloured card or use the coloured backgrounds I've created in the downloads. The envelopes need to be printed onto A3. You then cut around the edges and the mini diagrams will show you where to fold. Stick it all together with some glue or double sided tape and voila. Happy making!